Discover how to make these delicious sushi hand rolls using canned tuna. This simple recipe guides you through creating a flavorful tuna sushi roll, packed with fresh ingredients. Learn what sushi hand rolls are, how to roll them, and find step-by-step instructions for making a tuna hand roll at home.
Canned Tuna for Sushi
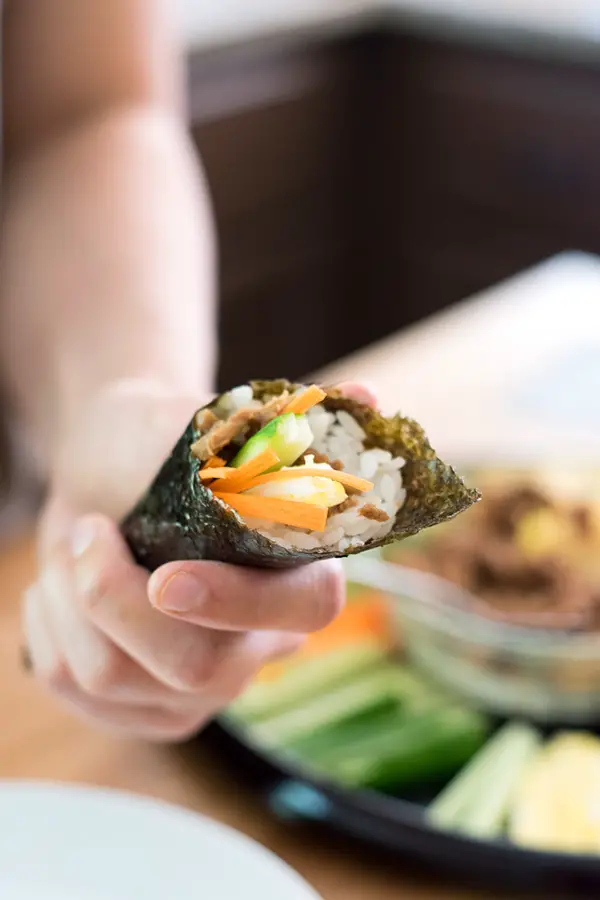
Alrighty, so, sushi. Everyone loves sushi… except those who don’t like raw fish. Well it turns out that there’s a lot of sushi that doesn’t use raw fish, and today I’m going to share with you a sushi recipe that uses canned tuna. That’s right, you can use canned tuna for sushi. This sushi recipe of the easiest style- Temakizushi, or hand roll sushi.
Basically what I’m trying to do here is show you that yes, YOU can make sushi, and you can make it with your family and friends and have a fun sushi making party!
What Is a Sushi Hand Roll?
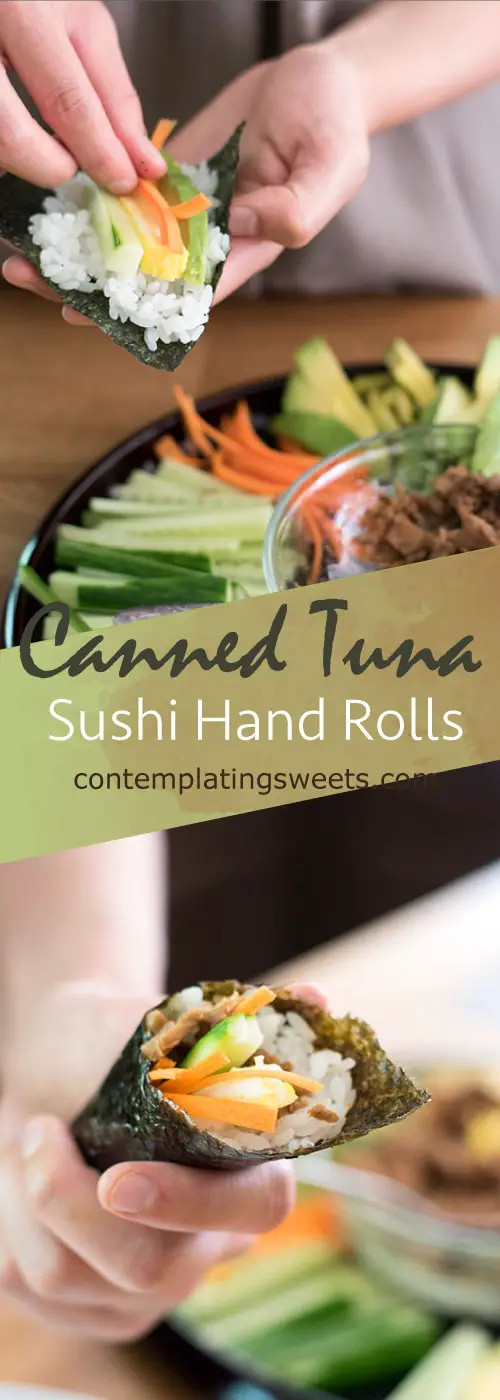
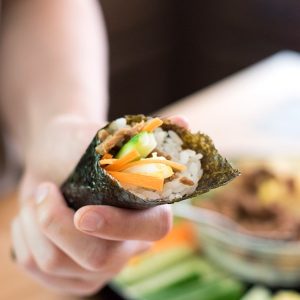
If you have never heard of Temakizushi/Temaki sushi or sushi hand rolls they are a popular type of sushi that is made by wrapping a sheet of nori (seaweed) around a filling of sushi rice, fish, vegetables, and other ingredients. It is cone-shaped and meant to be eaten with your hands. Sushi hand rolls are a convenient and portable way to enjoy sushi, and they offer a delicious combination of flavors and textures in each bite.
Temakizushi/Temaki sushi is my favorite way to eat sushi because it’s so no-fuss and customizable! With a little help, even my 2 and 4 year olds can make their own! You don’t need any special equipment, like a bamboo roller for rolled sushi, and this canned tuna sushi infinitely customizable.
Recipe for Tuna Sushi
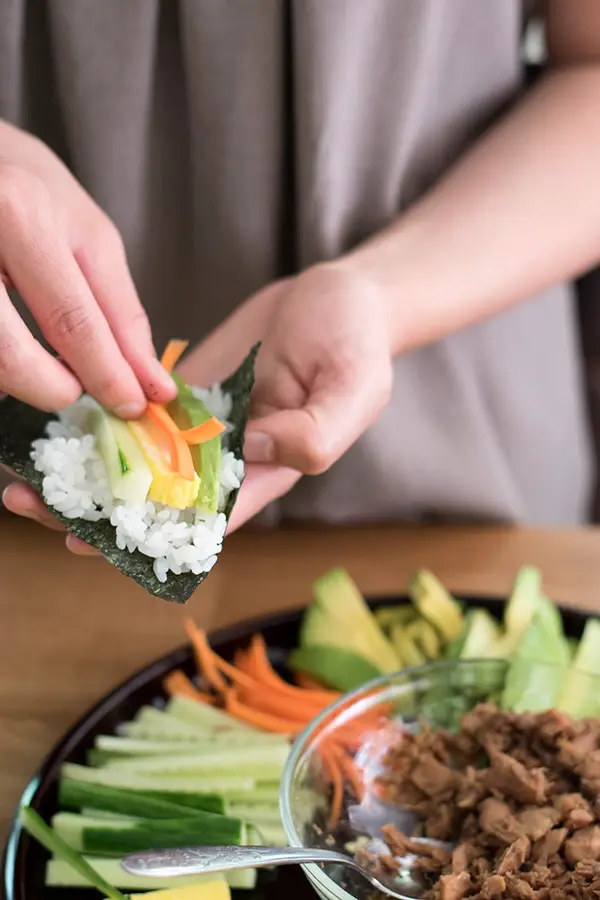
Basically you make sushi rice, you put some on a half sheet of sushi nori (seaweed), place your filling in it, and roll it on up! And guess what? If you don’t roll it nice… well, it’s going straight into your mouth, so who really cares? Actually, that’s kind of a non-Japanese way of thinking, and my American-ness is really shining through here! In Japan, presentation is critical, and making food in a sloppy way is frowned upon.
But, shh, don’t tell anyone, I’m actually kind of sloppy. Tekitou is the Japanese word to describe my cooking, and it’s kind of like a “fly by the seat of your pants” style. Confession: when I shot the video for this, I had to film like, ten canned tuna sushi rolls before I got one that was okay looking. I didn’t realize how bad mine looked until I did it in front of the camera!!! But, like I said, we are focusing here on taste… so, leave me alone.
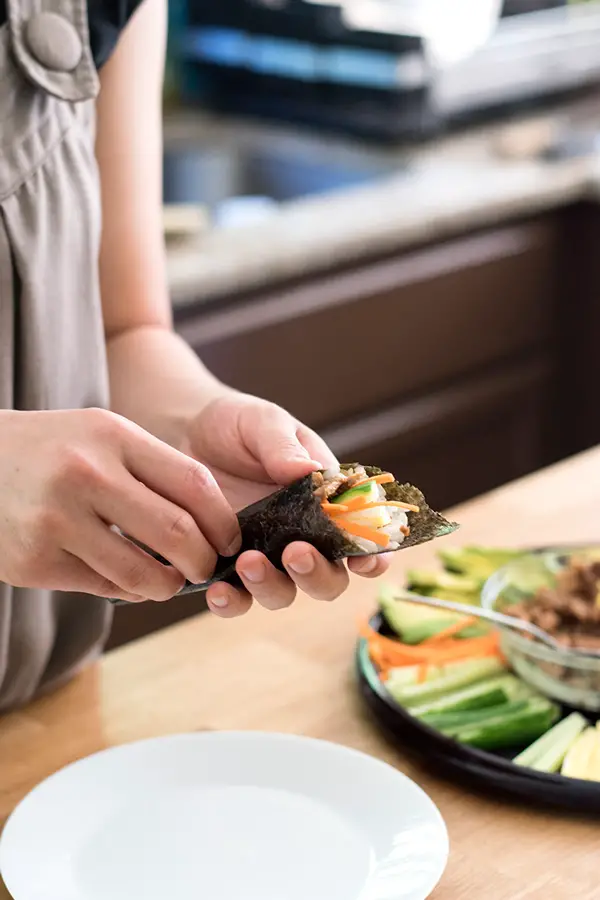
These canned tuna sushi hand rolls are so fun to make and eat! It’s a great way to break into the world of sushi, so give it a try. I have some other fun tuna and rice recipes, including tuna origiri, one of my most popular Japanese snacks. Give those a look too!
Tips for Making Canned Tuna Sushi Hand Rolls:
- Use short grain sushi rice: Sushi rice is essential for creating the perfect texture and taste for your hand rolls. Short grain sushi rice is stickier and helps hold the roll together.
- Prepare your fillings: Get creative with your fillings! Slice the cucumber, carrot, avocado, and any other veggies you prefer into thin, matchstick-like pieces. Cook the canned tuna with soy sauce, mirin, and sugar for added flavor.
- Rolling technique: Place the seaweed sheet on your palm, shiny side down. Add a couple of tablespoons of sushi rice to the left half of the sheet, press it down gently, and add your fillings diagonally. Start rolling from the bottom left corner to the top right corner, making a cone shape. Make sure to wrap the seaweed completely around the filling.
- Customize to your taste: Feel free to experiment with different ingredients and flavors. Add a touch of wasabi or your favorite sauces to enhance the taste. You can also try different combinations of veggies or substitute the canned tuna with other proteins like cooked shrimp or crab.
- Serve and enjoy promptly: Sushi hand rolls are best enjoyed immediately after rolling to maintain the crispness of the seaweed. Serve them on a plate or enjoy them straight from your hand. The customizable nature of hand rolls makes them perfect for sharing and enjoying with family and friends.
- Practice makes perfect: Don’t worry if your first few rolls don’t turn out perfectly. Rolling sushi takes practice, and it’s all about finding a technique that works for you. Focus on the flavors and enjoyment, and with time, you’ll master the art of rolling hand rolls.
- Have fun and get creative: Making sushi hand rolls is a fun and interactive activity. Involve your family and friends in the process, and let everyone create their own unique combinations. Enjoy the process of rolling
Canned Tuna Sushi Hand Rolls
Ingredients
- 3 rice cooker cups short grain sushi rice See note
- water
- 5 T rice vinegar
- 3 T sugar
- 1.5 t salt
- 1 5oz can albacore tuna
- 1 T soy sauce
- 1 T mirin
- 1 T sugar
- 1/2 English cucumber
- 1 carrot
- 1 avocado
- 3 eggs
- 10 sheets sushi nori (seaweed)
- wasabi optional
Order Supplies Online
Instructions
- Watch video above and see how I make these! Instructions for rice cooker: Wash the rice and strain a few times, and put in rice cooker bowl. Fill with water to the 3 cup sushi rice line, or slightly below the regular 3 cup line, and cook. See note, if you don’t have a rice cooker. Whisk together the rice vinegar, sugar, and salt in a small bowl. You may microwave it to warm it up if the salt and sugar don’t dissolve well. Set aside.
- While rice is cooking, cut the cucumber into approximately 3 inch long sticks, and cut the carrots to approximately 3 inch long matchstick size. Cut the avocado into sticks-ish. Avocado slices are awkward shaped, so just cut them into skinny-ish pieces. Combine the tuna with the soy sauce, mirin, and sugar, breaking into small pieces, and cook in a small sauce pan over medium heat. Let the mixture simmer until the tuna has soaked in the sauce and the pan is mostly dry. Set aside in a bowl.
- Whisk eggs together with a pinch of salt, and pour about 1/3 of it into a small non-stick pan, preferably a square tamagoyaki pan, but whatever you have on hand should work, as long as it’s not too big. When the bottom is cooked and the top is starting to look cooked through, start rolling the egg up. When the egg is all on the other side, pour another 1/3 of it in and repeat, rolling back. Put the remaining 1/3 in, and roll it up. Now you should have a nice rolled egg. If you don’t want to do that, then scramble the eggs. It won’t look as nice but it should technically work. If you made the rolled egg, cut into sticks about the size of the cucumber sticks. Cut your seaweed sheets in half.
- When the rice is done, transfer it to a large bowl, and pour the vinegar mix over it. Quickly, using your rice scooper or a thin spatula, stir the mixture until fully combined with rice. You want to use a sort of “cutting” motion, so you don’t smash the rice up.
- To make the hand rolls: Place the seaweed in your left palm, shiny side down, and add about 2-3 T of rice to the left half of the sheet. press down to flatten it and spread it out a bit, and place a few fillings in, diagonally from the bottom right to top left (see picture or video above). Take the bottom left corner and bring to the top right of the rice filling (middle of the sheet), and continue rolling it up until the seaweed is completely wrapped around it. I personally like to eat it as soon as I make it, but you can also place it on a plate. Just keep in mind that the seaweed won’t stay crisp for too long. It’s fine even if it gets soggy, but I think crisp has a better bite. Enjoy!
Notes
Nutrition
